Apr 14, 2013

Life in Instagram

1//High up drawing project & Amy!
2//Getting ready for school in the morning.
3//Pretty prints on my newest dresses (August Wrinkle & eShakti)
4//Bowling with this cutie.
5//Added this movie to my favorites.
6//My parents are redo-ing the living room!
7//Shaving since age 7.
8//Fruit tart from Whole Foods! Yuuuum.
9//Fun at Barnes and Noble.
10//Hiding out in the bathroom.


Xo Chloe.

Apr 8, 2013

Spring with Critters: Explorer Ally

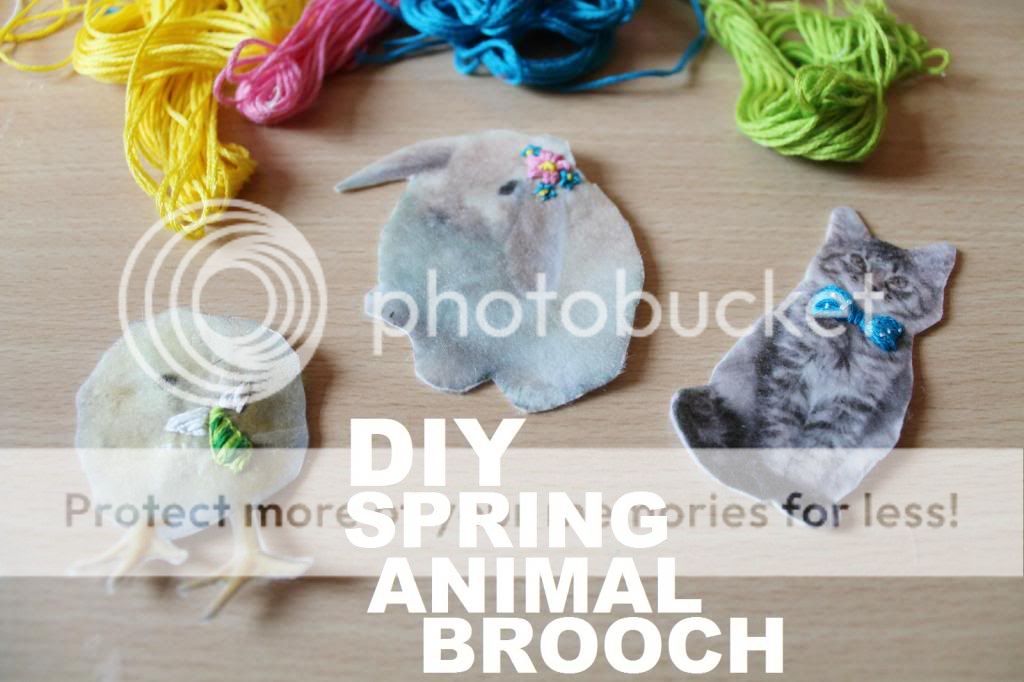
Hey there, I'm Ally and I blog over at Now That's Pretty. For this DIY I wanted to create something extra springy that I could wear to welcome in the bright flowers and warmer days. I don't think there's much more springy than baby animals and so I rustled up these cute badges! I've used embroidery thread to decorate mine but you can use pretty much anything; they'd look really cute with small flowers or sequins- oh the possibilities!

You will need:
Printable Iron on transfer paper
White felt
Embroidery Thread
A wide eyed needle
Scissors
Nail varnish
A badge fitting
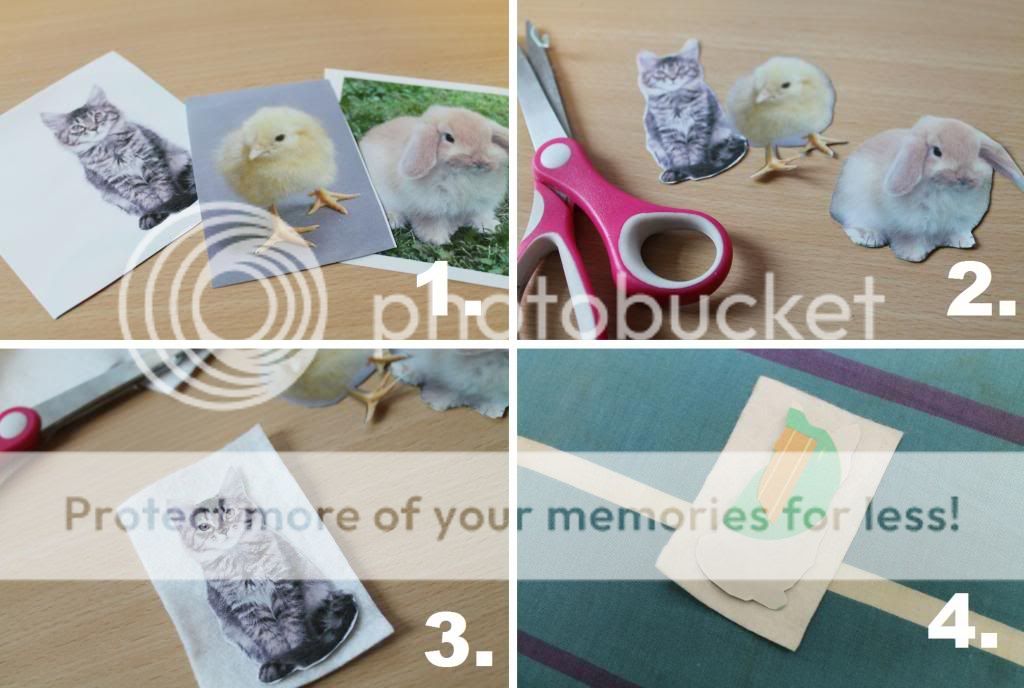
Some cute baby animal pictures (that's right I just gave you permission to browse the internet for some fluffy cuteness for a while. You're welcome.)


1) Firstly print your pictures on your transfer paper. Remember to flip them on the computer as the ironing will reverse them. 
2) Now cut out your pictures cutting as close to the images as you dare. It's much easier to trim your pictures at this stage than when they're on felt. 
3) Now cut out a piece of felt for your transfer. It should be a little larger to allow for embellishing. 
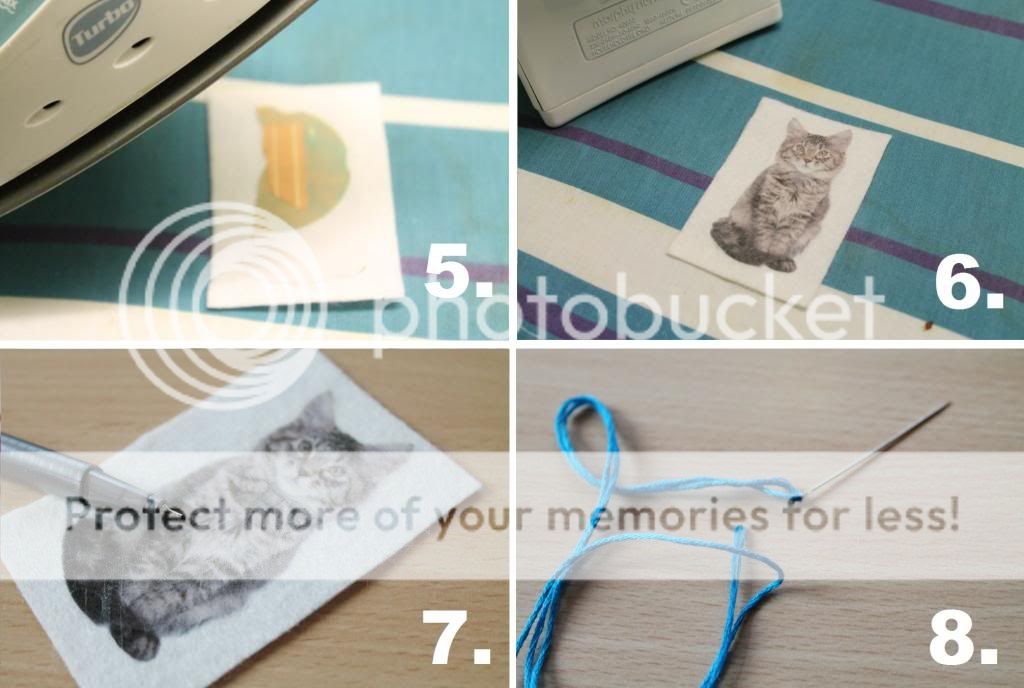
4) Lay your transfer image down on your felt and iron.


5) Allow your paper to cool a little before lifting up. 
6) Ta-da! You've made cat fabric, life is complete. 
7) Now for the embellishing. I've chosen to embroider my designs (don't worry it's super easy!) but you can use sequins or glitter or whatever floats your boat. Take a pen and mark out your design. 
8) Thread your embroidery thread. For me this is the trickiest part of the whole thing. Sigh. 


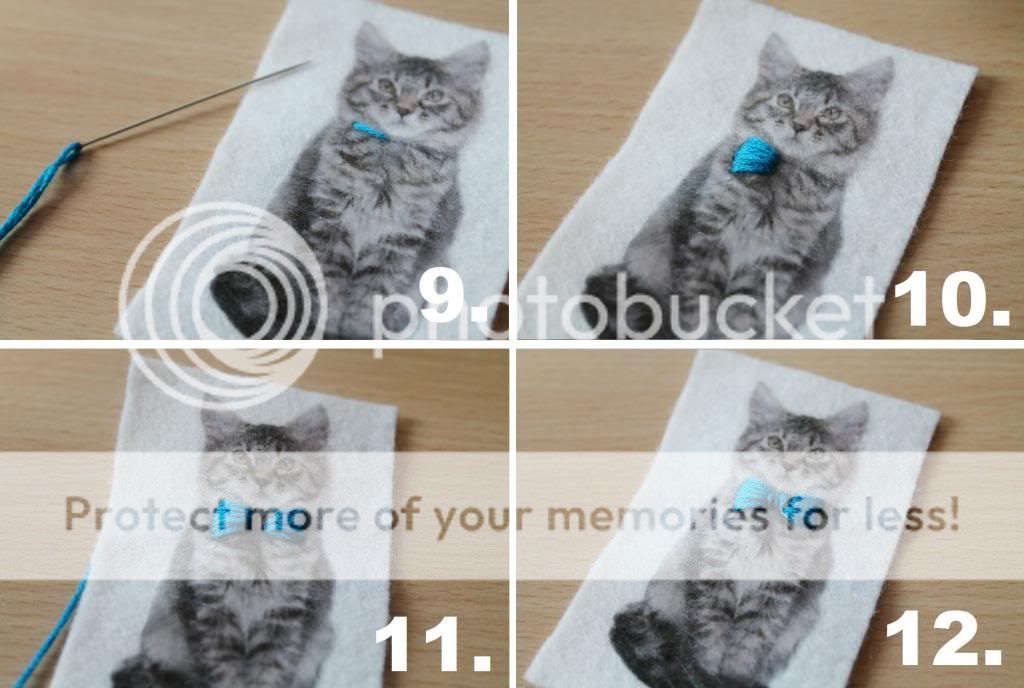
9) When embroidering just work to build up colour using short straight lines. 
10) To make the bow tie design all you need to do is a block on one side...
11) ...A block on the other...
12) And then a central piece which runs in the opposite direction. (So I had don't side parts of the bow tie from side to side whereas the middle I stitched up and down)

13) Tie a not in the back of your design to stop it unravelling. 
14) If you want to add more detail then simply go over the top with another colour. 
15) Now to seal your image apply nail varnish over the top avoiding the embroidery thread and wait to dry before cutting out. 
16) Lastly apply a badge or brooch fitting to the back and you are done!


Thanks so much for sharing this awesome DIY in the first Explorer Series! I am seriously in love with the kitty! You should sell these, Ally! Stop over at Now That's Pretty and say hi to Ally!


Xo Chloe.


Apr 2, 2013

Stuff I Luff #60

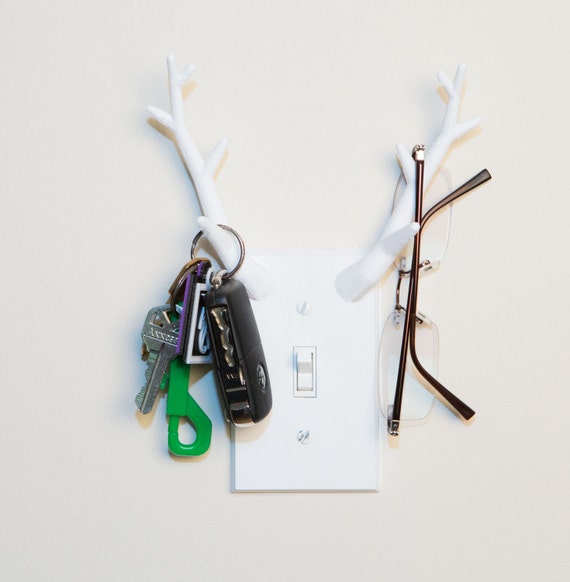
Genius. Genius. Genius. I never thought I would need a lightswitch cover so badly.

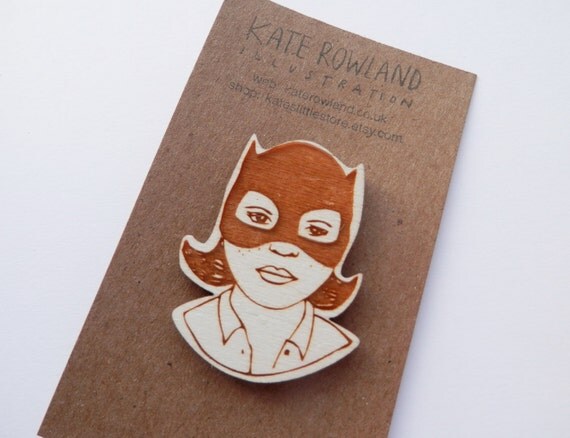
Eeeep! You guys know how much I love Ghost World. This wooden Enid brooch is right up my alley.


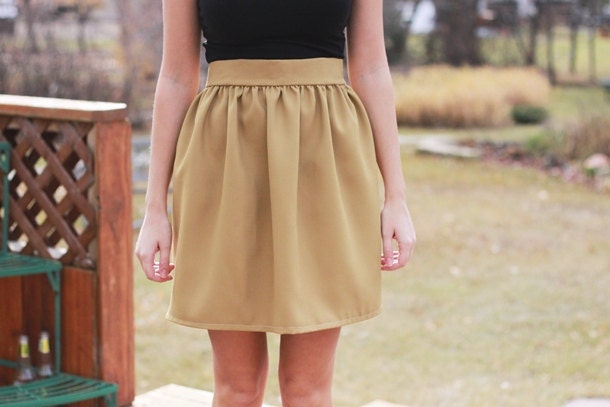
This skirt is so simple, but I love it. I am in need of some staple skirts, and this one is perfect!

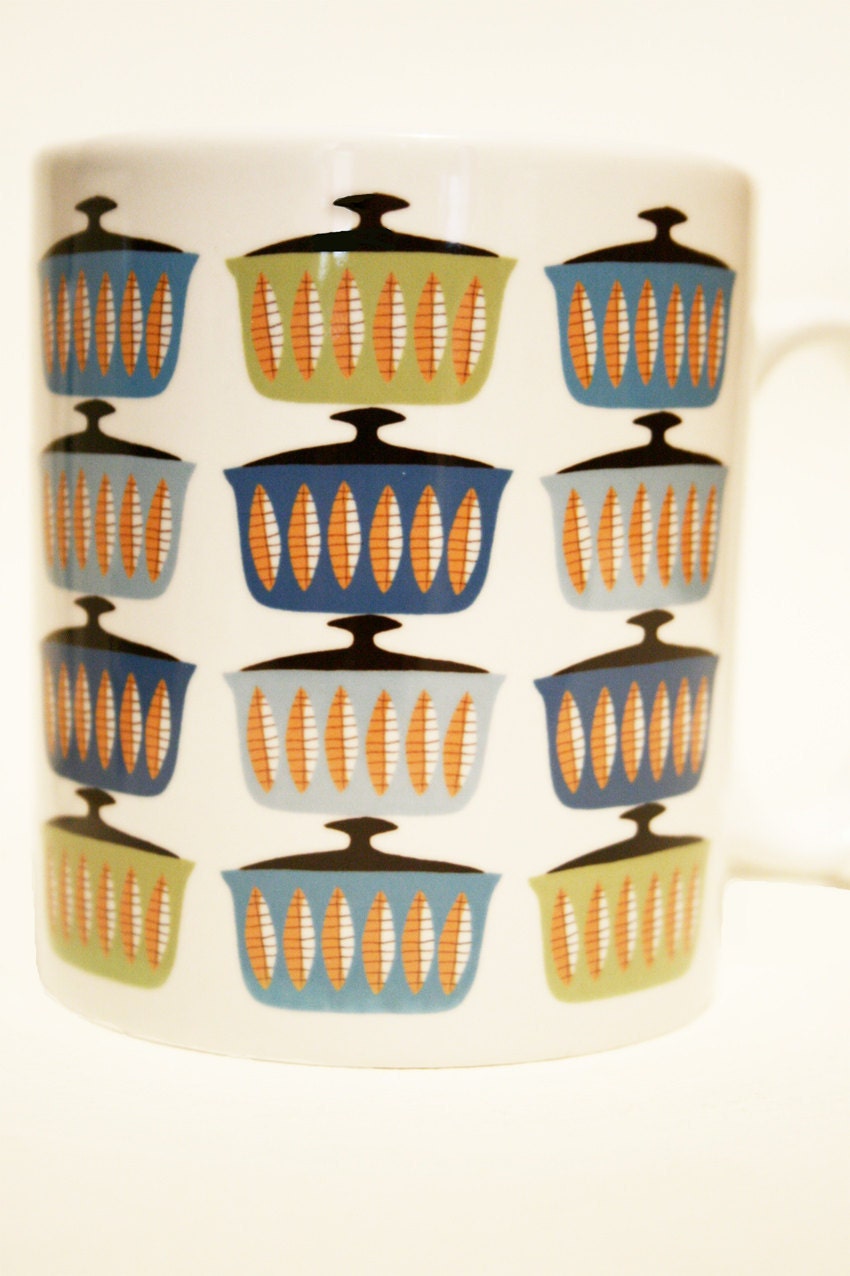
How wonderful is this mug?! There are tons of cute ones in Jilly Bird, and they are pretty cheap too!

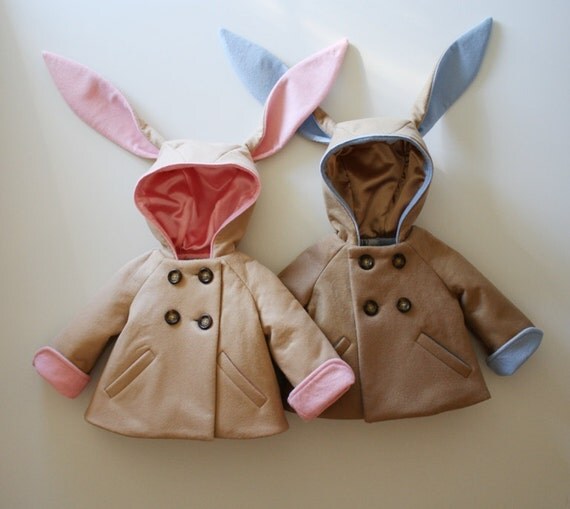
Little Goodall sells the cutest kids coats!

Everything is from Etsy this time! I need to ask for Etsy gift cards for Christmas this year (That's probably thinking wayyy to far ahead, ha!).
Xo Chloe.


Apr 1, 2013

Spring With Critters: Explorer Katherine


Hi lovers of Lazy Explorers, I'm Katherine from Of Corgis & Cocktails, a fellow lover of all things cute and cuddly. I have had an obsession with animal items for as long as I have been able to find them because I have the same obsession with adorable animals. I've got four pets - a corgi mix (he's the inspiration behind my blog title), a basset hound mix, and two guinea pigs (an Abyssinian and an American, if you're up on guinea pig breeds). You'll see the two pups hovering around in my outfit photos fairly often, but today, I wanted to show you something special. So here on Lazy Explorers is the blog premiere of Sir Tomas, one of my two guinea pigs.

Deer and Foxes and Rabbits Oh My!Deer and Foxes and Rabbits Oh My!Deer and Foxes and Rabbits Oh My!Deer and Foxes and Rabbits Oh My!Deer and Foxes and Rabbits Oh My!
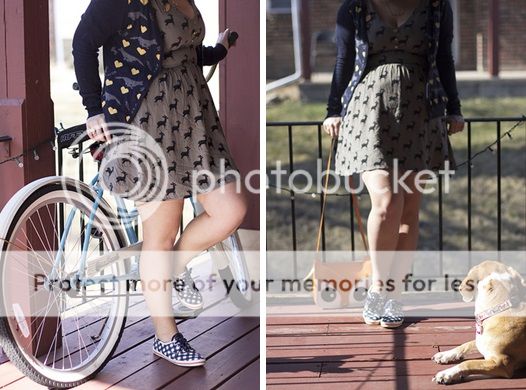
I chose tons of critter related things to celebrate the idea of spring with critters. Deer, foxes, rabbits, a squirrel, a hedgehog, birds, and a kitty are all found here - probably proof I may own too many critter related things - but really, is that such a problem? Can you spot all the critters?

Deer and Foxes and Rabbits Oh My!Deer and Foxes and Rabbits Oh My!
sweater & dress :: modcloth
sneakers :: kate spade x keds
satchel :: ebay
necklace :: target
pin & hairpin :: c/o sugar cookie
earrings :: c/o august wrinkle


Thanks so much Katherine for contributing your adorable outfit skills to the first ever Explorer Series! Seriously guys, go check out her blog, she is the cutest. Her and I seem to have very similar tastes.

Xo Chloe.